Bai Chilian boss guide: six flowers first, then the fight
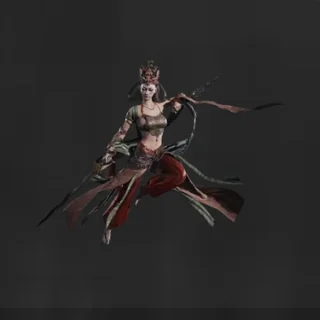
Bai Chilian teleports out of every combo and spends phase two in the air. Collect the six Memory Flowers in Crimson Forest first — they decide whether you get help.
FAQ
Where is Bai Chilian in Phantom Blade Zero?
Do the Memory Flowers matter for the Bai Chilian fight?
Why can I barely damage Bai Chilian?
What does Bai Chilian drop?
At a glance
| Region | Crimson Forest — Mirrorwood Depths |
| Chapter | Snake’s Reflection (chapter boss) |
| Type | Maskwalkers |
| Prep | Six Memory Flowers → ally joins phase 2 |
| Drop | White Serpent & Crimson Viper Resonance Talisman |
| Last checked | 2026-10-30 |
Before you walk in: the six flowers
Bai Chilian is the chapter boss, so the fight is unmissable — but the six Memory Flowers scattered through Crimson Forest are not, and they change the second phase outright. Collect all six and an ally joins you when phase two starts.
The trail runs through the areas you already clear on the way: the tunnel past Mirrorwood Entrance, the dragon pillar branch down to the tomb ground, the fog stretch in the middle, then Mirrorwood Depths and the passage beside its bell. If you have been ringing bells as you go, you have walked past most of them.
How she fights
She has two modes, and they want opposite responses:
- Teleport-and-lunge — she blinks in and attacks on the way in. There is no clean counter window during the approach, so this mode is about managing your Sha-Chi, not punishing.
- Standing strings — she plants and combos without blinking. This is the mode where you get to hit back, in the pauses between strings.
The dangerous overlap is the close-range black-aura attack in her lunge mode. It arrives fast, it empties your Sha-Chi on a block, and it is the most common way this fight kills people.
How to fight her
Charge into her teleports with the Outlaw Warblade
The Outlaw Warblade is the loadout answer to her blinking. When she lands two sword slashes and vanishes, start charging — release as she reappears and you land two hits before she can reset. Stagger resistance means she cannot interrupt the charge, so this is one of the few reliable damage sources in the fight.
Follow with a quick sidestep and charge again. Repeat until she changes pattern.
The side roll into a back teleport
When she barrel rolls sideways through the air, hold block — a volley of daggers comes first. Then she vanishes and teleports behind you with two blockable hits.
Those two hits are the best window in phase one: counterattack immediately after the second one. She stays open long enough for a full combo.
The Sha-Chi drain from behind
After a long vanish she can reappear behind you with a Sha-Chi-draining strike. Dodge the moment she closes, and expect a three-hit combo ending in a lethal, dodgeable sword thrust. Blocking the first two is fine; the thrust is a dodge, always.
Phase 2 — the airborne problem
Phase two opens with five aggressive swings, a five-hit serpent string, and a parryable lunge. Block the strings, parry the lunge — that single parry staggers her heavily and is your biggest opening of the fight.
After that she mostly hangs in the air on her strings, and only takes real damage when staggered and grounded. Stay close so you can reach her the instant she drops, rather than sprinting across the arena.
Gear
| Slot | Pick | Why |
|---|---|---|
| Main weapon | Outlaw Warblade | Charge through her teleports; stagger resistance |
| Weapon skill | Release on her reappearance | Two guaranteed hits per blink |
| Defence plan | Block strings, dodge thrusts | Most attacks blockable, finishers are not |
| Camera | Unlock during air phase | The glint is the whole tell |
The Warblade also heals on hit, which quietly covers the chip damage you take in the lunge phase — the mode you cannot cleanly avoid.
Rewards
White Serpent & Crimson Viper Resonance Talisman — the chapter reward, and the reason the rest of Village of Lu opens up.
Notes
- Six flowers or solo phase two. This is the single biggest lever on difficulty.
- Two hits after a back-teleport. That window is phase one’s whole damage plan.
- The thrust after the drain is a dodge, never a block.
- Parry the phase-two lunge. It is the one parry that matters.
- She is only hittable on the ground. Chase the drop, not the air.
Related
- Snake’s Reflection — the chapter she closes
- Stone Hand Iron Fever — the boss before her
- All bosses
Related Articles
bosses
Snake's Reflection bosses: four fights in Crimson Forest
Four bosses in order: Hua Qianxiao, Jing Ye, Stone Hand Iron Fever, Bai Chilian. Plus the six-flower unlock that puts an ally into Bai Chilian's second phase.
bosses
Hua Qianxiao boss guide: interrupt the drink, or kite the bridge
Hua Qianxiao turns his Sha-Chi into a shield every time he drinks. Break the gourd charge with the Dread Axe, or run the bridge and let the shield drain on its own.
bosses
Jing Ye boss guide: three phases, two health bars, one shortcut
Jing Ye opens mounted, then fights behind a spiked shield that punishes plain attacks. Break it with the Dread Axe, or skip melee with a tipsy ranged build.
Was this helpful?
Thanks for the feedback!